Emilie's Pastries
 
Picture
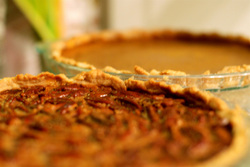
Pate Brisee (Short Crust Pastry):

1 1/4 cups (175 grams) all-purpose flour

1/2 teaspoon salt

1 tablespoon (14 grams) granulated white sugar

1/2 cup (113 grams) unsalted butter, chilled, and cut into 1 inch (2.54 cm) pieces

1/8 to 1/4 cup (30 - 60 ml) ice water

Pecan and Gingersnap Layer: (optional)

1/4 cup (25 grams) pecans, toasted and ground

1/4 cup (25 grams) crushed gingersnap cookies

Pumpkin Filling:

3 large eggs

2 cups fresh pumpkin puree or 1 - 15 ounce can (425 grams) pure pumpkin

1/2 cup (120 ml) heavy whipping cream

1/2 cup (110 grams) light brown sugar

1 teaspoon ground cinnamon

1/2 teaspoon ground ginger

1/8 teaspoon ground cloves

1/2 teaspoon salt

Maple Whipped Cream:

1 cup (240 ml) heavy whipping cream

1 1/2 tablespoons pure maple syrup


Pate Brisee:  In a food processor, place the flour, salt, and sugar and process until combined.  Add the butter and process until the mixture resembles coarse meal (about 15 seconds).  Pour 1/8 cup (30 ml) water in a slow, steady stream, through the feed tube until the dough just holds together when pinched.  If necessary, add more water.  Do not process more than 30 seconds.

Turn the dough onto your work surface and gather into a ball.   Flatten into a disk, cover with plastic wrap, and refrigerate for 30 minutes to one hour before using.  This will chill the butter and relax the gluten in the flour

After the dough has chilled sufficiently, place on a lightly floured surface, and roll into a 13 inch (33 cm) circle.  (To prevent the pastry from sticking to the counter and to ensure uniform thickness, keep lifting up and turning the pastry a quarter turn as you roll (always roll from the center of the pastry outwards).)  Fold the dough in half and gently transfer to a 9 inch (23 cm) pie pan.  Brush off any excess flour and tuck the overhanging pastry under itself.  Use a fork to make a decorative border.  Alternatively, you can trim the pastry to the edge of the pie pan.  With the remaining pastry make decorative cut-outs (leaves, pumpkins, etc.) and with a little water, attach them around the lip of the pie pan.  Refrigerate the pastry, covered with plastic wrap, for about 30 minutes before pouring in the filling. 

Pecan and Gingersnap Layer:  Toast pecans in a 350 degree F (180 degree C) oven for 8 minutes or until lightly browned and aromatic.  Cool and then place the pecans in a food processor and process until finely ground.  Combine the ground pecans with the crushed gingersnap cookies.  Press this mixture evenly onto the bottom and up the sides of the unbaked pie crust.  Cover and return the pastry to the refrigerator while you make the pumpkin filling.

Increase the oven temperature to 375 degrees F (190 degrees C) and place rack in bottom third of the oven. 

Make the Pumpkin Filling:  In a large bowl lightly whisk the eggs.  Add the remaining ingredients and stir to combine.  Pour the mixture into the prepared pie shell and place on a large baking pan to catch any spills.  Bake the pie for about 45 to 55 minutes or until the filling is set and the crust has browned (the center will still look wet).  (A knife inserted about 1 inch (2.54 cm) from side of pan will come out almost clean.)

Place the baked pie on a wire rack to cool.  Serve at room temperature with maple whipped cream.  Store any leftovers in the refrigerator

Makes one 9 inch (23 cm) pie.

Make the Maple Whipped Cream:

Place the heavy whipping cream and maple syrup in bowl of your electric mixer.  With the whisk attachment, whip the cream until soft peaks form.


Read more: http://www.joyofbaking.com/pumpkinpie.html#ixzz1KMD0hdZd
 
Picture
1/2 cup (110 grams) popcorn kernels or about 10 cups of popped corn

1 1/2 cups (300 grams) granulated white sugar

1/2 cup (110 grams) packed dark brown sugar

1/2 cup (120 ml) light corn syrup

1/2 cup (120 ml) water

2 tablespoons (28 grams) butter

2 teaspoons kosher salt

2 teaspoons baking soda


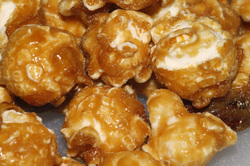
Caramel Corn: Preheat the oven to 120 degrees F (49 degrees C) and place the oven rack in the center of the oven. Pop the corn and place in a large stainless steel bowl that has been lightly buttered or sprayed with a non stick cooking spray. Place the bowl, with the popcorn, in the oven (this will keep the popcorn warm).

In a large heavy bottomed saucepan, stir together the sugars, corn syrup, and water. Place the saucepan over medium heat and bring to a boil, stirring occasionally. Once the mixture boils, cover, and boil the mixture for about one to two minutes. (This allows steam to form which then condenses and washes off any sugar crystals that have attached themselves to the sides of the saucepan.) Uncover the saucepan and clamp a candy thermometer to the side of the saucepan. Boil the mixture over medium heat, stirring occasionally, until the temperature reaches the soft ball stage, 240 degrees F (116 degrees C). At this point, stir in the butter. Continue to cook the caramel, stirring occasionally, until the temperature reaches the hard crack stage, 300 degrees F (149 degrees C). (Brush down the sides of the pan, with a heatproof pastry brush that has been dipped in warm water, to remove any sugar crystals that may have formed on the sides of the saucepan.)

Then remove the saucepan from the heat and carefully stir in the salt and baking soda. (The caramel will foam up when you add the baking soda so be very careful.) Pour the caramel over the popcorn and toss, with two heatproof spatulas or wooden spoons (not your fingers), to evenly coat the popcorn. The caramel corn will be in large clumps so spread the caramel corn onto a large sheet of aluminum foil. Then, while the caramel corn is still hot, separate it into bite-size pieces, with two forks or by wearing heatproof gloves. Cool completely and then store in an airtight container, at room temperature, for about 10 days.

Makes about 8 servings.


Read more: http://www.joyofbaking.com/candy/CaramelCorn.html#ixzz1KMAjAcKP
 
Picture
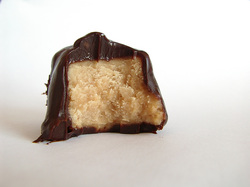
This is not a picture I took, but I found it on the internet. The balls where all eaten before I could take a picture of them. (=

Peanut Butter Balls 2 cups (500 grams) creamy peanut butter

1/4 cup (57 grams) unsalted butter, room temperature

1/4 teaspoon salt

1/2 teaspoon pure vanilla extract

2 - 2 1/2 cups (230 - 290 grams) confectioners (powdered or icing) sugar

Chocolate Coating

9 ounces (255 grams) semi sweet chocolate, coarsely chopped

2 tablespoons (25 grams) shortening


Peanut Butter Balls:


Line a baking sheet with parchment paper.

Place the peanut butter, unsalted butter, and salt in a microwaveable bowl, and heat in the microwave for about one minute or until just soft (check and stir the ingredients every 20 seconds). Stir in the vanilla extract and confectioners sugar and mix until it has the consistency of a dough (add more sugar if necessary).

Roll the dough into 1 inch (2.5 cm) round balls. Place on the cookie sheet and refrigerate for about one hour, or until firm.

Melt the chocolate and shortening in a heatproof bowl over a saucepan of simmering water. Dip the balls, one at a time, in the melted chocolate, making sure the entire ball is coated with chocolate. Then, with two spoons or a dipping fork, remove the peanut butter ball from the melted chocolate, allowing any excess chocolate to drip back into the bowl. Place the chocolate covered balls back on the baking sheet. When all the balls have been dipped in the chocolate, place in the refrigerator until the chocolate has set. Store in an airtight container for up to two weeks. To serve: place in small fluted candy cups.

Note: If you want to make Buckeyes: place a toothpick into each peanut butter ball and dip, one ball at a time, into the melted chocolate, leaving the top quarter of each ball undipped.

Makes about 40 pieces, depending on size. Preparation time 30 minutes
.


Read more: http://www.joyofbaking.com/candy/PeanutButterBalls.html#ixzz1KM9cuhLL
 
Picture
1 cup (130 grams) all-purpose flour

2 teaspoons baking powde


1/4 teaspoon salt


2 tablespoons (28 grams) granulated white sugar


1 large egg, lightly beaten


1 cup (240 ml) milk


2 tablespoons (28 grams) unsalted butter, melted


Plus extra melted butter for greasing the pan.


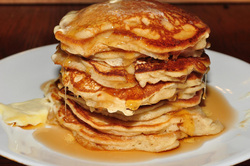
Pancake Recipe: In a large bowl whisk together the flour, baking powder, salt and sugar.  In a separate bowl whisk together the egg, milk, and melted butter. Add the egg mixture to the flour mixture, all at once, and stir or whisk just until combined. The batter should have some small lumps. Make sure you do not over mix the batter or the pancakes will be tough. Heat a frying pan or griddle over medium high heat until a few sprinkles of water dropped on the pan or griddle splatter. Using a pastry brush, brush the pan with a little melted butter.

Using a small ladle or scoop, pour about 1/4 cup of pancake batter onto the pan, spacing the pancakes a few inches from each other. When the bottoms of the pancakes are brown and bubbles start to appear on the top surfaces of the pancakes (2-3 minutes), turn over. Cook until lightly browned (about 1-2 minutes).

Repeat with remaining batter, brushing the pan with melted butter between batches.

Serve immediately with butter and maple syrup.

Makes about 8 - 3-inch (7.5 cm) pancakes.  Serves 3-4 people.

For Blueberry Pancakes: Sprinkle fresh blueberries on the tops of the pancakes just as bubbles start to appear on the top surface of the frying batter. Preparation time 15 minute


Read more: http://www.joyofbaking.com/breakfast/Pancakes.html#ixzz1KM8SETvM

 
Picture
Chocolate Marshmallow Cupcakes: 2 ounces (60 grams) unsweetened chocolate, chopped

2 tablespoons (15 grams) unsweetened cocoa powder (not Dutch-processed)

1/2 cup (120 ml) boiling water

1 cup plus 2 tablespoons (150 grams) all purpose flour

1 teaspoon baking powder

1/2 teaspoon baking soda

1/4 teaspoon salt

1/2 cup (113 grams) unsalted butter, room temperature

1 cup (200 grams) granulated white sugar

2 large eggs

1 teaspoon pure vanilla extract

1/2 cup (120 ml) milk

Marshmallow Cream Frosting:

1 cup (226 grams) unsalted butter, room temperature

1 teaspoon pure vanilla extract

1 - 7 ounce (198 grams) jar of marshmallow creme

2 cups (230 grams) confectioners sugar (icing or powdered sugar), sifted

2-4 tablespoons light cream


Chocolate Cupcakes: Preheat oven to 350 degrees F (177 degrees C) and place rack in center of oven. Line 15 muffin cups with paper liners.

In a stainless steel or heatproof bowl place the chopped unsweetened chocolate and cocoa powder. Pour the boiling water over the chocolate and cocoa powder and stir until they have melted. Set aside to cool while you make the batter.

In a separate bowl, whisk to combine, the flour, baking powder, baking soda, and salt. 

In the bowl of your electric mixer, or with a hand mixer, beat the butter until smooth and creamy. Gradually add the sugar and continue beating until the mixture is fluffy. Add the eggs, one at a time, beating well after each addition. Scrape down the sides of the bowl as needed. Add the vanilla extract and melted chocolate mixture and beat to combine.

Add the milk and flour mixtures in three additions, beginning and ending with the flour mixture. Beat only until the ingredients are incorporated.

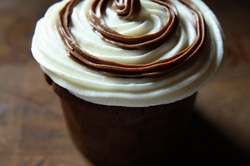
Evenly divide the batter among the muffin cups, and bake for about 18 - 23 minutes or until a toothpick inserted in the center of a cupcake comes out clean. Remove from oven and place on a wire rack to cool. Pipe (I used a Wilton 1M star tip) or spread frosting on each cupcake.

Marshmallow Cream Frosting: In the bowl of your electric mixer, or with a hand mixer, beat the butter until smooth and well blended. Beat in the vanilla extract and marshmallow creme. With the mixer on low speed, gradually beat in the sugar. Scrape down the sides of the bowl as needed. Add the cream and beat to combine. Then, on high speed, beat frosting until it is light and fluffy (about 3-5 minutes). Add more cream or confectioners sugar if necessary to get the right piping consistency.

Makes about 15 regular-sized cupcakes.


Sources:

Read more: http://www.joyofbaking.com/cupcakes/ChocolateMarshmallowCupcakes.html#ixzz1KM78y02V
 
Picture
2 3/4 cups (355 grams) all purpose flour

3/4 cup (75 grams) unsweetened Dutch processed cocoa powder

1/2 teaspoon salt

1 teaspoon (4 grams) baking powder

1 cup (227 grams) unsalted butter, room temperature

1 3/4 cups (350 grams) granulated white sugar

2 large eggs

                                                                                         2 teaspoons pure vanilla extract


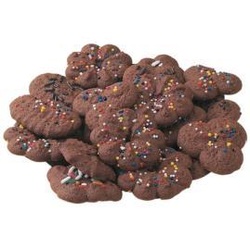
For Chocolate Sugar Cookies:  In a large bowl whisk together the flour, cocoa powder, salt, and baking powder. 

In the bowl of your electric mixer (or with a hand mixer), beat the butter and sugar until light and fluffy (about 3 to 4 minutes). Add the eggs, one at a time, beating well after each addition. Add the vanilla extract and beat until combined. Add the flour mixture and beat until you have a smooth dough.

Divide the dough in half and wrap each half in plastic wrap. Refrigerate for about one hour or until firm enough to roll.

Preheat oven to 350 degrees F (177 degrees C) and place rack in the center of the oven. Line two baking sheets with parchment paper. 

Remove one half of the chilled dough from the refrigerator and, on a lightly floured surface, roll out the dough to a thickness of 1/4 inch (1 cm). (Keep turning the dough as you roll, making sure the dough does not stick to the counter.)  Cut out desired shapes using a lightly floured cookie cutter and transfer cookies to the prepared baking sheet. Place the baking sheets with the unbaked cookies in the refrigerator for 10 to 15 minutes to chill the dough which prevents the cookies from spreading and losing their shape while baking.

Note: If you are not going to frost the baked cookies, you may want to sprinkle the unbaked cookies with crystal or sparkling sugar. 

Bake cookies for about 10  - 12 minutes (depending on size) or until they are firm around the edges. Remove from oven and let cookies cool on baking sheet for a few minutes before transferring to a wire rack to finish cooling. Frost with royal icing, if desired. Be sure that the frosting on the cookies dries completely before storing. (This may take several hours.) Frosted cookies will keep several days in an airtight container. Store between layers of parchment paper or wax paper.

Makes about 36 - 4 inch (10 cm) cookies.


Royal Icing Using Egg Whites:

2 large (60 grams) egg whites

2 teaspoons fresh lemon juice

3 cups (345 grams) confectioners (powdered or icing) sugar, sifted

or

Royal Icing Using Meringue Powder:

4 cups (440 grams) confectioners' (powdered or icing) sugar, sifted

3 tablespoons (30 grams) meringue powder

1/2 teaspoon almond extract (optional)

1/2 cup - 3/4 cup (120 - 180 ml)  warm water

Food Coloring (I use Gel Pastes that can be found at cake decorating and party stores or else on-line)

For Royal Icing with Egg Whites:  In the bowl of your electric mixer (or with a hand mixer), beat the egg whites with the lemon juice. Add the sifted powdered sugar and beat on low speed until combined and smooth. Mix in food coloring, if desired. The icing needs to be used immediately or transferred to an airtight container as royal icing hardens when exposed to air. Cover with plastic wrap when not in use.

For Royal Icing with Meringue Powder: In the bowl of your electric mixer (or with a hand mixer), beat the confectioners' sugar and meringue powder until combined.  Add the water and beat on medium to high speed until very glossy and stiff peaks form (5 to 7 minutes). If necessary, to get the right consistency, add more powdered sugar or water. Mix in food coloring, if desired. To cover or 'flood' the entire surface of the cookie with icing, the proper consistency is when you lift the beater, the ribbon of icing that falls back into the bowl remains on the surface of the icing for a few seconds before disappearing.

The icing needs to be used immediately or transferred to an airtight container as royal icing hardens when exposed to air. Cover with plastic wrap when not in use.

Makes about 3 cups.


Read more: http://www.joyofbaking.com/ChocolateSugarCookie.html#ixzz1F0cDrsA2

 
Picture
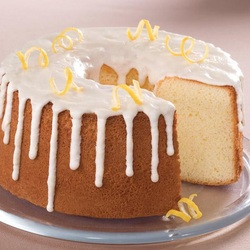
Ingredients:
  • 2 cups sifted cake flour
  • 1-1/2 cups granulated sugar
  • 1 tablespoon baking powder
  • 1/2 teaspoon salt
  • 1/2 cup vegetable oil
  • 8 eggs , separated
  • 1/4 cup lemon juice
  • 1/4 cup water
  • 2-1/2 tablespoons grated lemon zest
  • 1/2 teaspoon cream of tartar
  • Glaze
  • 6 tablespoons butter , melted
  • 1 tablespoon grated lemon zest
  • 2 cups confectioners' sugar
  • 3 tablespoons lemon juice
  • 1 teaspoon pure vanilla extract
Makes: About 12 servings.


Preheat oven to 325°F.

In large bowl, sift flour, granulated sugar, baking powder and salt. Add oil, egg yolks, lemon juice, water and lemon zest; whisk until well combined. In large bowl, beat egg whites and cream of tarter with electric mixer to stiff peaks. Fold 1/3 of whipped whites into the batter to lighten. Gently fold in the remaining whites until mixture is combined; do not overmix or batter will deflate. Pour into ungreased pan; tap gently on counter to release air pockets.

Bake 50-60 minutes or until cake springs back when touched. Invert pan immediately after removing from oven; cool completely. Run knife around the sides and center of cake to loosen.

For glaze, combine butter, zest, confectioners’ sugar, juice and vanilla in medium bowl; stir until smooth. Pour over cooled cake and spread with spatula. Glaze that drips off cake can be scooped back up with spatula. Glaze will set hard within 30 minutes.


Picture


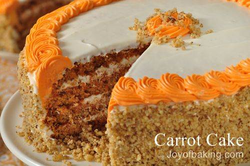
Carrot Cake Recipe:
  • 1 cup (100 grams) pecans or walnuts
  • 3/4 pound (340 grams) raw carrots (about 2 1/2 cups finely grated)
  • 2 cups (260 grams) all-purpose flour
  • 1 teaspoon baking soda
  • 1 1/2 teaspoons baking powder
  • 1/2 teaspoon salt
  • 1 1/2 teaspoons ground cinnamon
  • 4 large eggs
  • 1 1/2 cups (300 grams) granulated white sugar
  • 1 cup (240 ml) safflower, vegetable or canola oil (or other flavorless oil)
  • 2 teaspoons pure vanilla extract
Cream Cheese Frosting:
  • 1/4 cup (57 grams) unsalted butter, room temperature
  • 8 ounces (227 grams) cream cheese, room temperature
  • 2 cups (230 grams) confectioners (powdered or icing) sugar, sifted
  • 1 teaspoon (4 grams) pure vanilla extract
  • 1 teaspoon finely grated lemon zest (outer yellow skin)
Garnish: (Optional)

  • 1 cup (100 grams) toasted and finely chopped walnuts or pecans
  • Marzipan Carrots (See instructions on bottom of this carrot cake recipe)

--------------------------------------

Carrot Cake:

Preheat oven to 350 degrees F (180 degrees C) and place rack in center of oven. Butter or spray two - 9 x 2 inch (23 x 5 cm) cake pans and line the bottoms of the pans with a circle of parchment paper. 

Toast the pecans or walnuts for about 8 minutes or until lightly browned and fragrant. Let cool and then chop coarsely.

Peel and finely grate the carrots. Set aside.


In a separate bowl whisk together the flour, baking soda, baking powder, salt, and ground cinnamon. Set aside.


In bowl of electric mixer (or with a hand mixer), beat the eggs until frothy (about 1 minute). Gradually add the sugar and beat until the batter is thick and light colored (about 3 - 4 minutes). Add the oil in a steady stream and then beat in the vanilla extract. Add the flour mixture and beat just until incorporated. With a large rubber spatula fold in the grated carrots and chopped nuts. Evenly divide the batter between the two prepared pans and bake 25 to 30 minutes or until a toothpick inserted in the center comes out clean.  


Remove from oven and let cool on a wire rack. After about 5 -10 minutes invert the cakes onto the wire rack, remove the pans and parchment paper, and then cool completely before frosting. 


To assemble: place one cake layer, top side down, onto your serving plate. Spread with about one third of the frosting. Gently place the other cake, top of cake facing down, onto the frosting, and spread the rest of the frosting over the top and sides of the cake. If desired, press toasted and finely chopped nuts on the sides of the cake and decorate the top of the cake with marzipan carrots (see below). Cover and refrigerate any leftovers.


Serves 10 - 12.


Read more: http://www.joyofbaking.com/CarrotCake.html#ixzz1D1zBweVp

Picture
Marzipan Carrots:


To make the carrots you will need: Marzipan and orange and green icing colors (can use liquid or paste food coloring). Knead a small amount of orange food coloring into the marzipan until the color is distributed and is the desired "carrot" color. Shape into carrots, using a toothpick to make veins. Knead a small amount of green food coloring into the marzipan and make the carrot tops.

Marzipan is a cooked mixture of finely ground almonds, sugar, and water. It is slightly sweeter and firmer than almond paste and has a smoother texture. It comes in plastic-wrapped rolls.


Read more: http://www.joyofbaking.com/CarrotCake.html#ixzz1D1ypLFmS

 
Picture
 
Picture


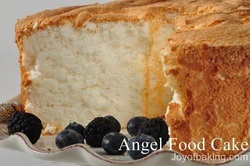
Angel Food Cake Recipe:
1 1/4 cups (125 grams) sifted cake flour

1 1/2 cups (300 grams) granulated white sugar, divided

1 1/2 cups (360 ml) egg whites, at room temperature (from about 12 large eggs)

1 teaspoon cream of tartar

1/2 teaspoon salt

1 tablespoon fresh lemon juice

2 teaspoons pure vanilla extract

1/2 teaspoon pure almond extract

Note:  Cream of Tartar is tartaric acid and is a fine white crystalline acid salt which is a by-product of the wine-making industry.  It is used when whipping egg whites to stabilize them and to prevent over beating and the whites drying out.

Angel Food Cake: Preheat oven to 350 degrees F (177 degrees C) and place rack in center of oven. Have ready a 10 inch (25 cm) two piece angel food cake (tube) pan.

In a large bowl sift together 3/4 cup (150 grams) granulated white sugar and the sifted cake flour.

In your electric mixer, with the whisk attachment, beat the egg whites until foamy. Add the cream of tartar, lemon juice, and salt and continue to beat until soft peaks form. Gradually beat in the remaining 3/4 cup (150 grams) granulated white sugar, a tablespoon at a time, until glossy stiff peaks form. Scrape down the sides of the bowl as needed. Beat in the vanilla extract and almond extract.

Sift the flour mixture over the egg whites (about one quarter of the flour mixture at a time) and gently but quickly fold (do not stir) the flour into the egg whites. You can use a large wire whisk or a large rubber spatula. (It is important not to over fold the batter or it will deflate.)

Pour the batter into the pan and run a metal spatula or knife through the batter to get rid of any air pockets. Smooth the top and bake in the preheated oven for about 40 - 45 minutes. The cake is done when a wooden skewer inserted in the center of the cake comes out clean and the cake springs back when gently pressed. The top of the cake will have cracks. Do not over bake.

Immediately upon removing from the oven invert the pan.  Suspend the pan by placing the inner tube on the top of a wine bottle or flat topped glass. Allow the cake to cool for about 1 1/2 hours.

When completely cool, run a metal spatula or knife around the sides of the pan to loosen the cake and then remove the cake from the pan. Next, run a metal spatula or knife along the bottom and center core of the pan and remove. Place on your serving plate. It is best to cut this cake with a serrated knife using a back-and-forth sawing motion. Try not to press down on the cake when cutting as this will squash its soft and spongy texture. 

This cake is best served on the day it is made but it will keep covered for a few days at room temperature or for several days in the refrigerator. It is great toasted.

This cake can be eaten alone with just a dusting of confectioners' (powdered or icing) sugar. Is also wonderful with fresh berries and softly whipped cream. Another idea is to serve with ice cream, strawberry or raspberry puree, or chocolate sauce.

Serves 12


Read more: http://www.joyofbaking.com/AngelFoodCake.html#ixzz1CQmL1jhR